ML with Swift - Core ML Image Classifier

Before you start, have a look at
Apple’s powerful Core ML, Create ML frameworks with Swift is a great option for adding machine learning to your projects. In this post, we’ll dive into how you can use Swift’s speed and type safety to train and integrate machine learning models right into your apps—no need to leave your favorite language behind.
What is Core ML
Core ML is Apple’s machine learning framework that makes it easy for developers to add smart features to their apps on iPhone, iPad, Mac, Apple Watch, and Apple TV. It’s built to run models right on your device, using Apple’s powerful hardware—like the CPU, GPU, and Neural Engine—so everything works quickly and efficiently without draining your battery.
Why Swift for Machine Learning?
- Performance Swift compiles to native code, offering excellent performance for ML inference
- Type Safety Strong typing helps catch errors at compile time
- Ecosystem Integration Deep integration with Apple’s ML frameworks (Core ML, Create ML, Vision etc.)
- Native iOS/macOS Integration Direct deployment to Apple devices with hardware acceleration
- Developer Experience Familiar syntax for iOS developers entering ML space
Core ML Example Project - Image Classifer
Before we start
- Download MobileNetV2 CoreML Model
- Go ahead and create an empty Xcode project
- Add the downloaded
MobileNetV2file to the project
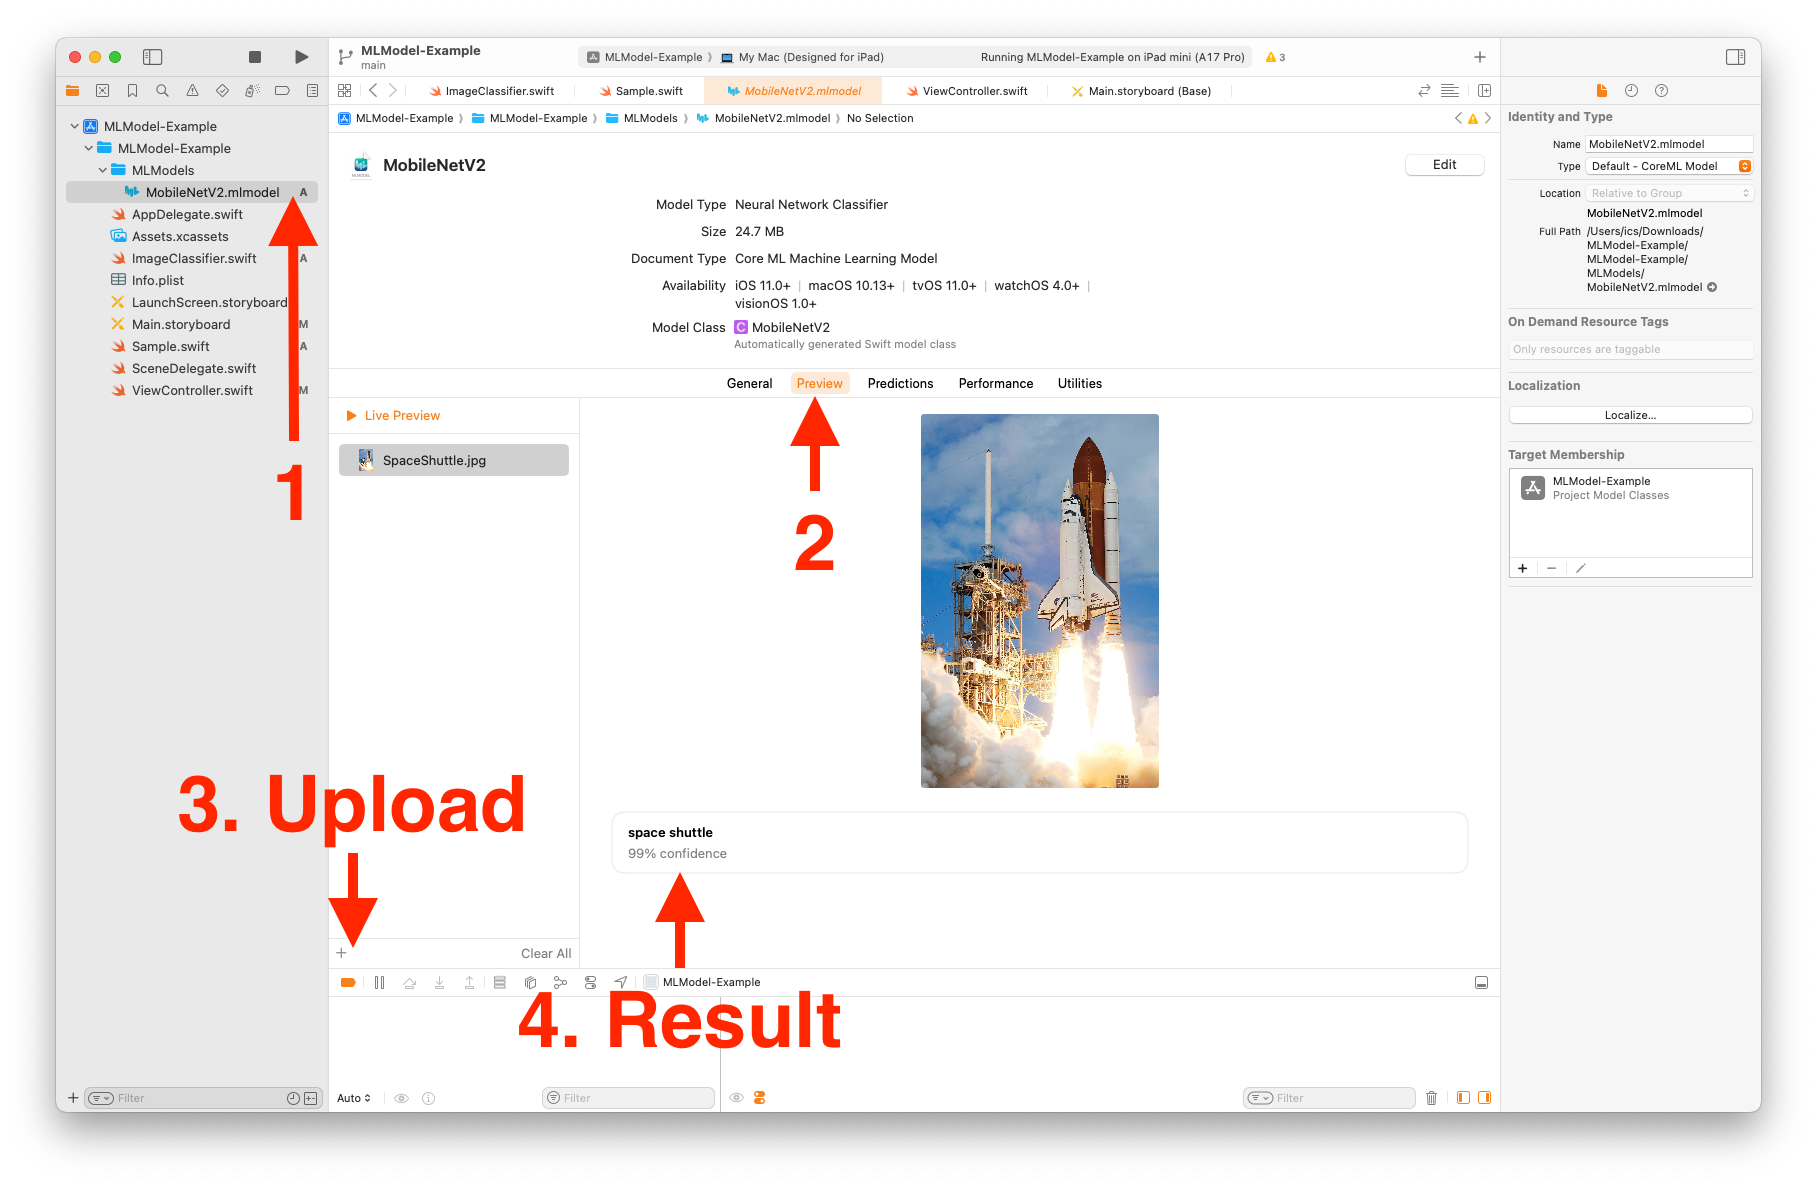
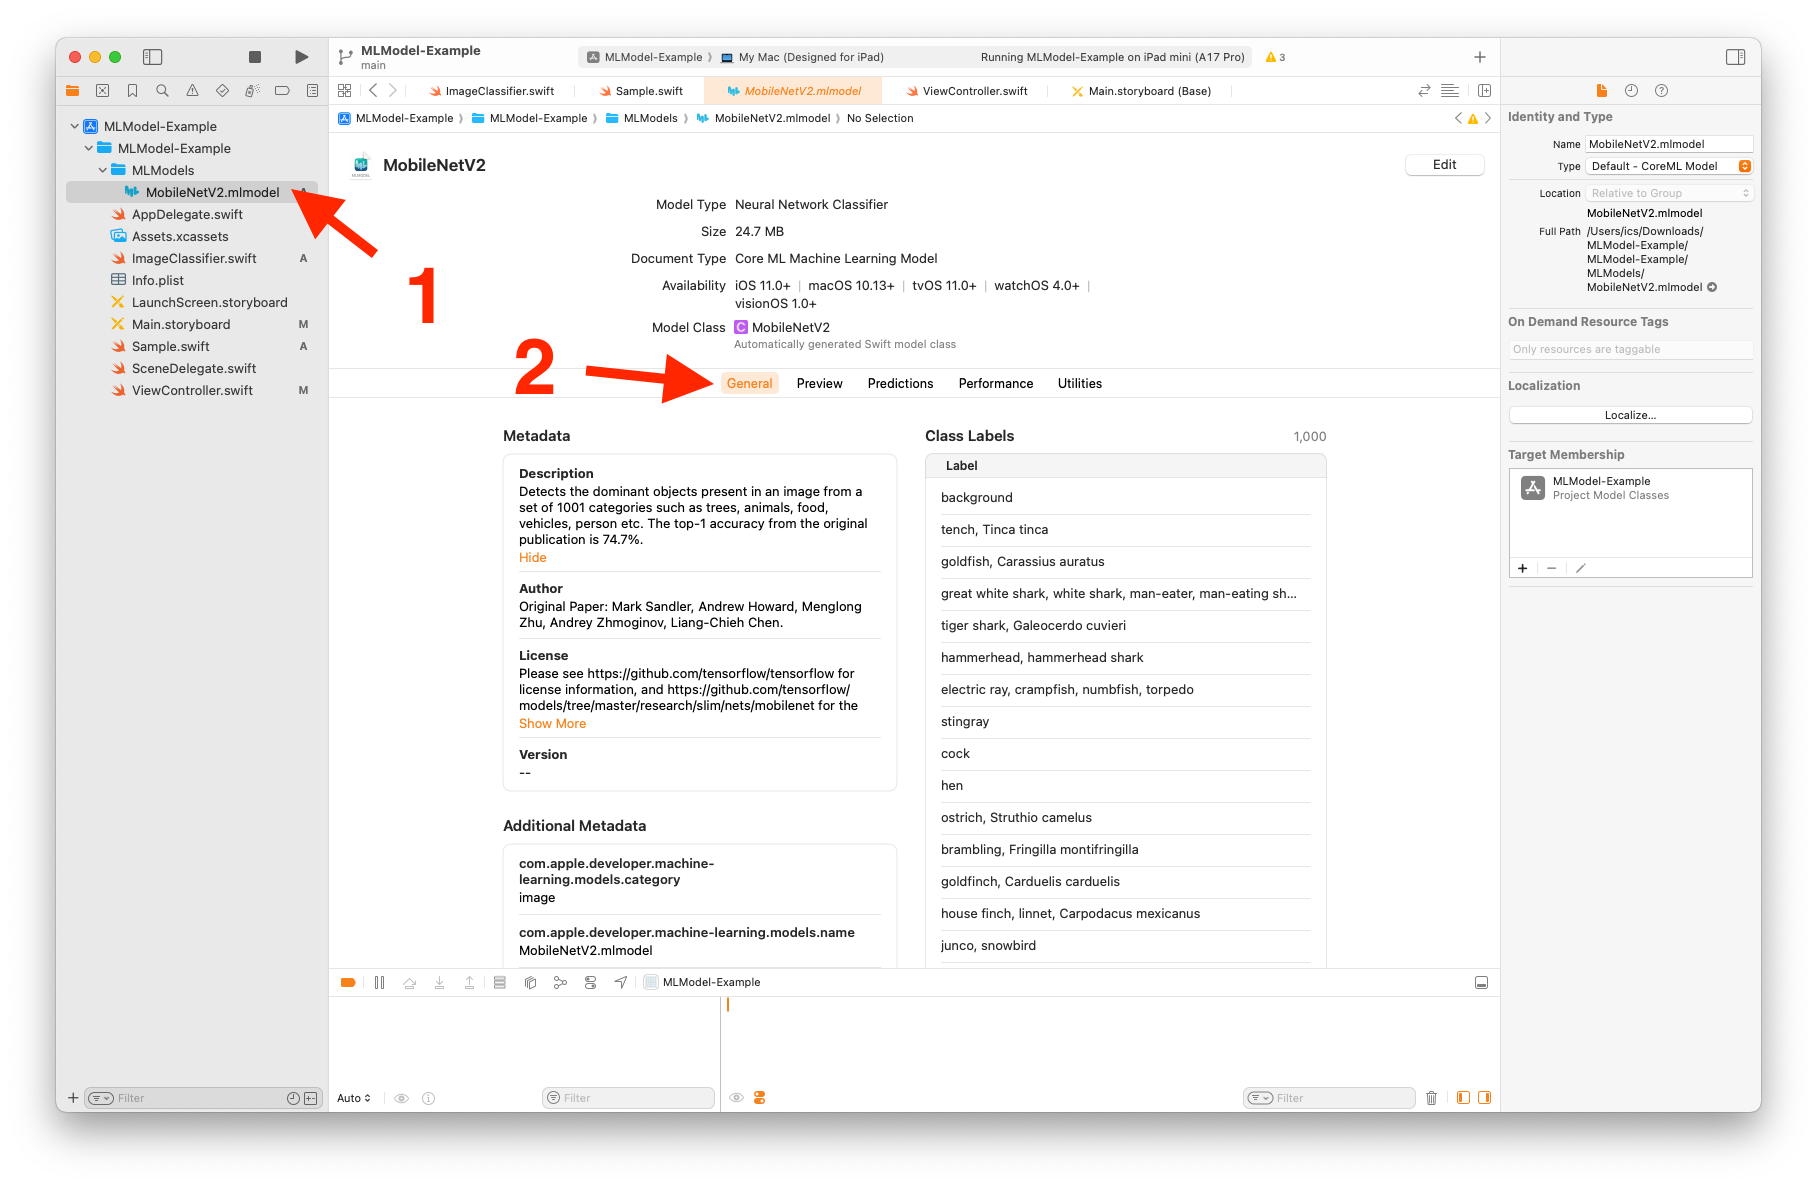
Before we integreate Core ML, let us have a look into the model MobileNetV2 that is added.
Go ahead, click on the model file that you added to the project. You can explore “General” and “Preview” tabs.
Basic Core ML Integration
Download this completed project (You need to add the
MobileNetV2file to it)
Here’s how to integrate a pre-trained image classification model.
Create ImageClassifier.swift file to the project and add the below code.
// ImageClassifier.swift

import CoreML
import Vision
import UIKit

class ImageClassifier {
    private var model: VNCoreMLModel?

    init() {
        setupModel()
    }

    private func setupModel() {
        guard let modelURL = Bundle.main.url(forResource: "MobileNetV2", withExtension: "mlmodelc"),
              let model = try? VNCoreMLModel(for: MLModel(contentsOf: modelURL)) else {
            print("Failed to load Core ML model")
            return
        }
        self.model = model
    }

    func classifyImage(_ image: UIImage, completion: @escaping (String?) -> Void) {
        guard let model = model,
              let ciImage = CIImage(image: image) else {
            completion(nil)
            return
        }

        let request = VNCoreMLRequest(model: model) { request, error in
            guard let results = request.results as? [VNClassificationObservation],
                  let topResult = results.first else {
                completion(nil)
                return
            }

            completion("\(topResult.identifier) (\(Int(topResult.confidence * 100))%)")
        }

        let handler = VNImageRequestHandler(ciImage: ciImage)
        try? handler.perform([request])
    }
}
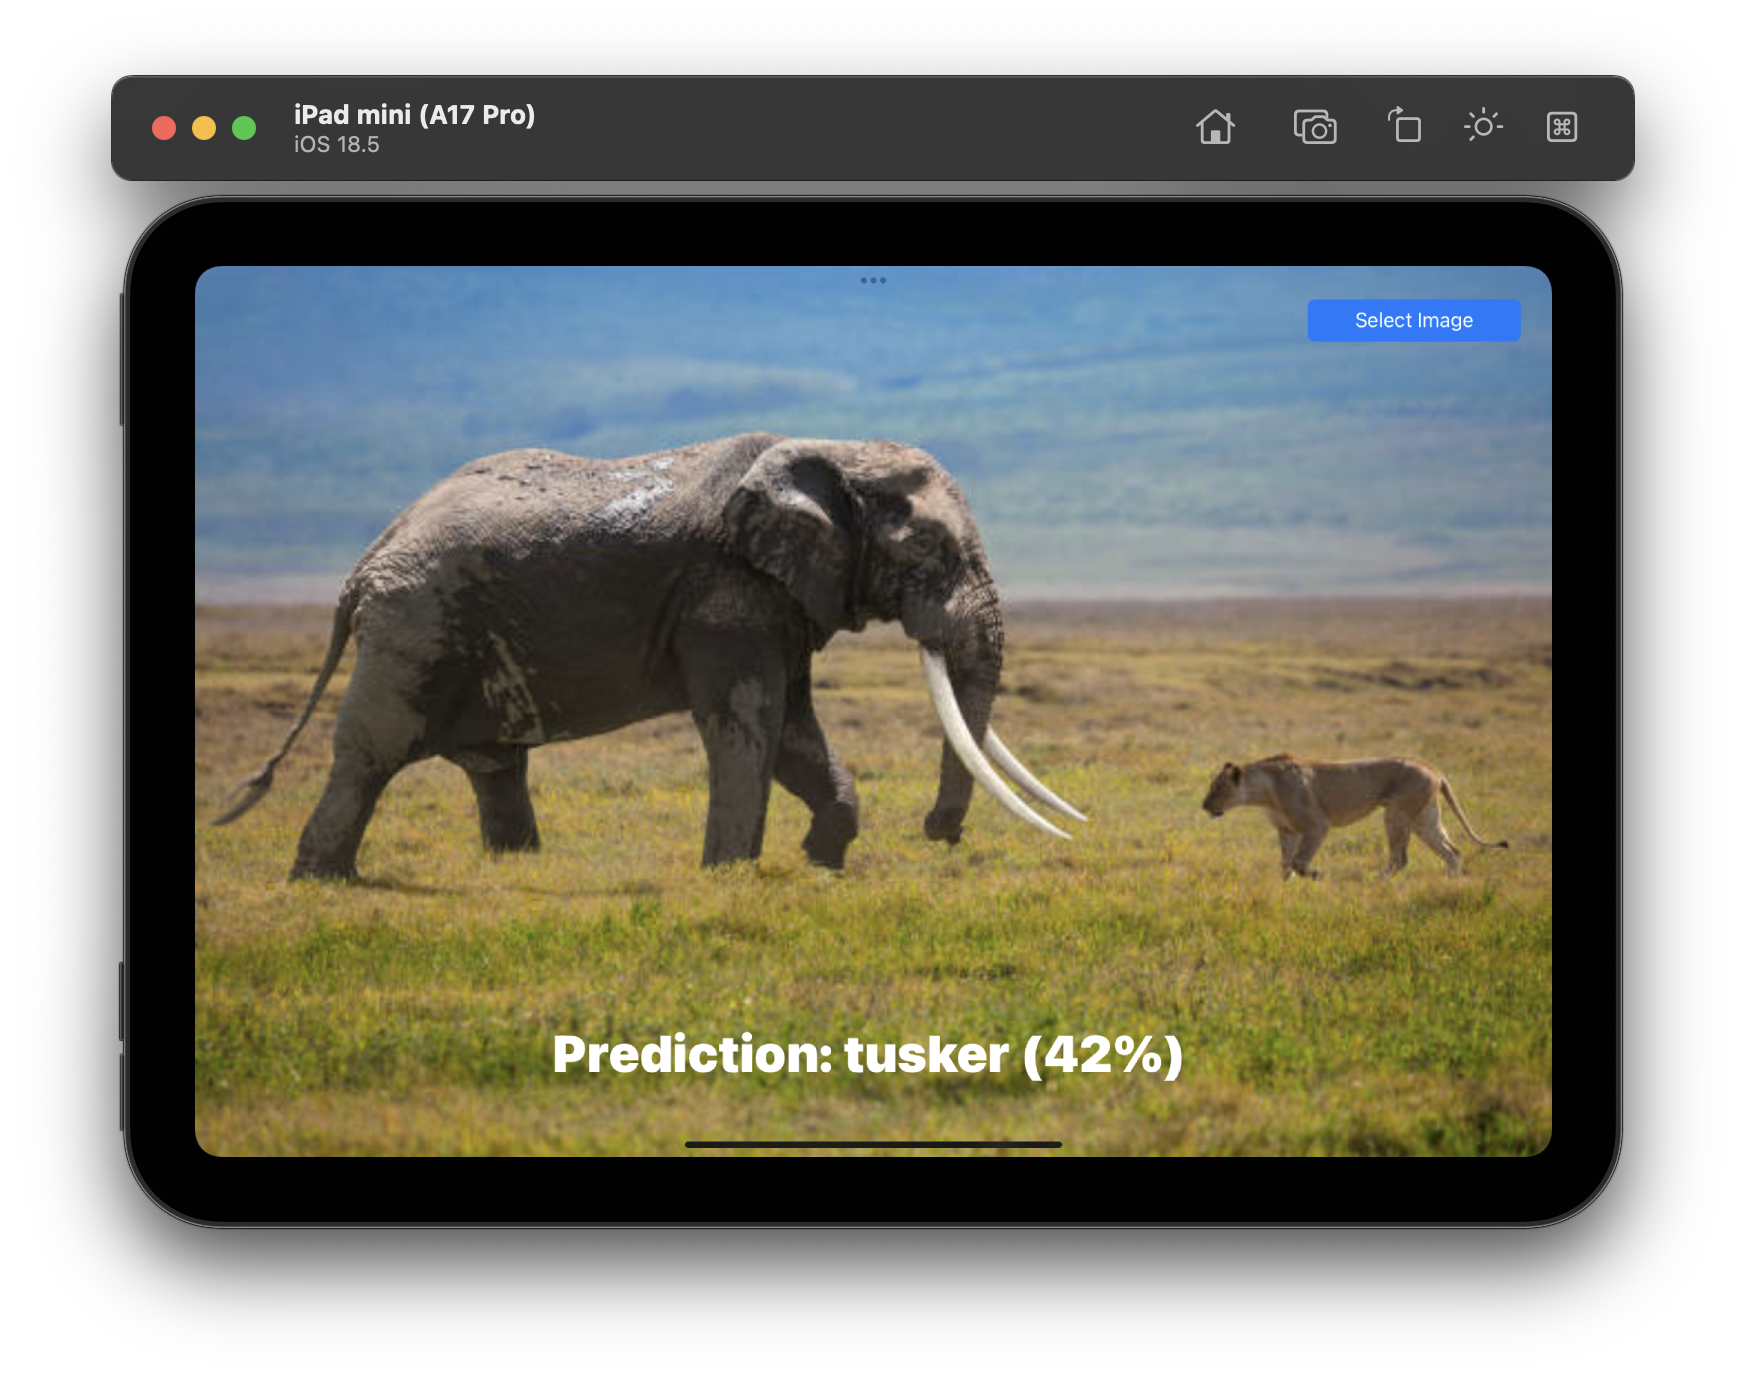
Now, try to run the project and play with it.
Example Usages
- Standalone Image
class AsyncUsageExample: UIViewController {
    let classifier = ImageClassifier()

    func classifyWithAsync() async {
        guard let image = UIImage(named: "sample_image") else { return }

        let result = await classifier.classifyImage(image)

        // Update UI on main thread
        await MainActor.run {
            if let prediction = result {
                print("Async classification result: \(prediction)")
            } else {
                print("Async classification failed")
            }
        }
    }
}
- Using async/await
extension ImageClassifier {
    func classifyImage(_ image: UIImage) async -> String? {
        return await withCheckedContinuation { continuation in
            classifyImage(image) { result in
                continuation.resume(returning: result)
            }
        }
    }
}

class AsyncUsageExample: UIViewController {
    let classifier = ImageClassifier()

    func classifyWithAsync() async {
        guard let image = UIImage(named: "sample_image") else { return }

        let result = await classifier.classifyImage(image)

        // Update UI on main thread
        await MainActor.run {
            if let prediction = result {
                print("Async classification result: \(prediction)")
            } else {
                print("Async classification failed")
            }
        }
    }
}
- Batch processing
extension ImageClassifier {
    func classifyImages(_ images: [UIImage], completion: @escaping ([String?]) -> Void) {
        let group = DispatchGroup()
        var results: [String?] = Array(repeating: nil, count: images.count)

        for (index, image) in images.enumerated() {
            group.enter()
            classifyImage(image) { result in
                results[index] = result
                group.leave()
            }
        }

        group.notify(queue: .main) {
            completion(results)
        }
    }
}

class BatchProcessingExample: UIViewController {
    let classifier = ImageClassifier()

    func classifyMultipleImages() {
        let images = [
            UIImage(named: "image1"),
            UIImage(named: "image2"),
            UIImage(named: "image3")
        ].compactMap { $0 }

        classifier.classifyImages(images) { results in
            for (index, result) in results.enumerated() {
                if let prediction = result {
                    print("Image \(index + 1): \(prediction)")
                } else {
                    print("Image \(index + 1): Classification failed")
                }
            }
        }
    }
}
Best Practices
- Model Size Management: Keep models under 50MB for app store optimization
- Error Handling: Always handle model loading and prediction failures gracefully
- Privacy: Process sensitive data on-device when possible
- Testing: Create comprehensive unit tests for your ML pipeline
- Monitoring: Track model performance and accuracy in production
Conclusion
Swift provides a powerful platform for machine learning development, especially for Apple ecosystem applications. Whether you’re using Core ML for inference, CreateML for training, or building custom solutions, Swift’s performance and type safety make it an excellent choice for ML projects.
The combination of Swift’s modern language features with Apple’s optimized ML frameworks creates opportunities for building intelligent, responsive applications that can leverage the full power of Apple’s hardware, including the Neural Engine.
Start experimenting with these examples and explore how machine learning can enhance your Swift applications!